Convert PNG or JPG to SVG in Inkscape
A practical single-scan workflow for a dark logo, silhouette or monochrome drawing on a light background.
Import the image, select it, then open Path → Trace Bitmap. Use Single scan → Brightness cutoff, preview the important details and click Apply. Remove the original image and save the new path as SVG. Saving an imported bitmap with an .svg filename alone does not vectorize it.
Choose an image that will trace cleanly
Use the clearest source you have. Small compressed JPGs can produce rough edges and extra nodes; PNG avoids additional JPEG compression but cannot restore detail already lost. Crop unrelated objects before tracing.
Brightness cutoff turns dark regions into filled shapes. It traces the edges of a thick line, not a single line down its middle. For multicolor artwork, Inkscape has a separate Multicolor mode; this example does not test that workflow.
Trace the image in six steps
Import and select the bitmap
Open Inkscape and choose File → Import. Select your PNG or JPG and choose Embed when prompted. Click the image with the Selector tool; the status bar should identify an Image.
Open Trace Bitmap
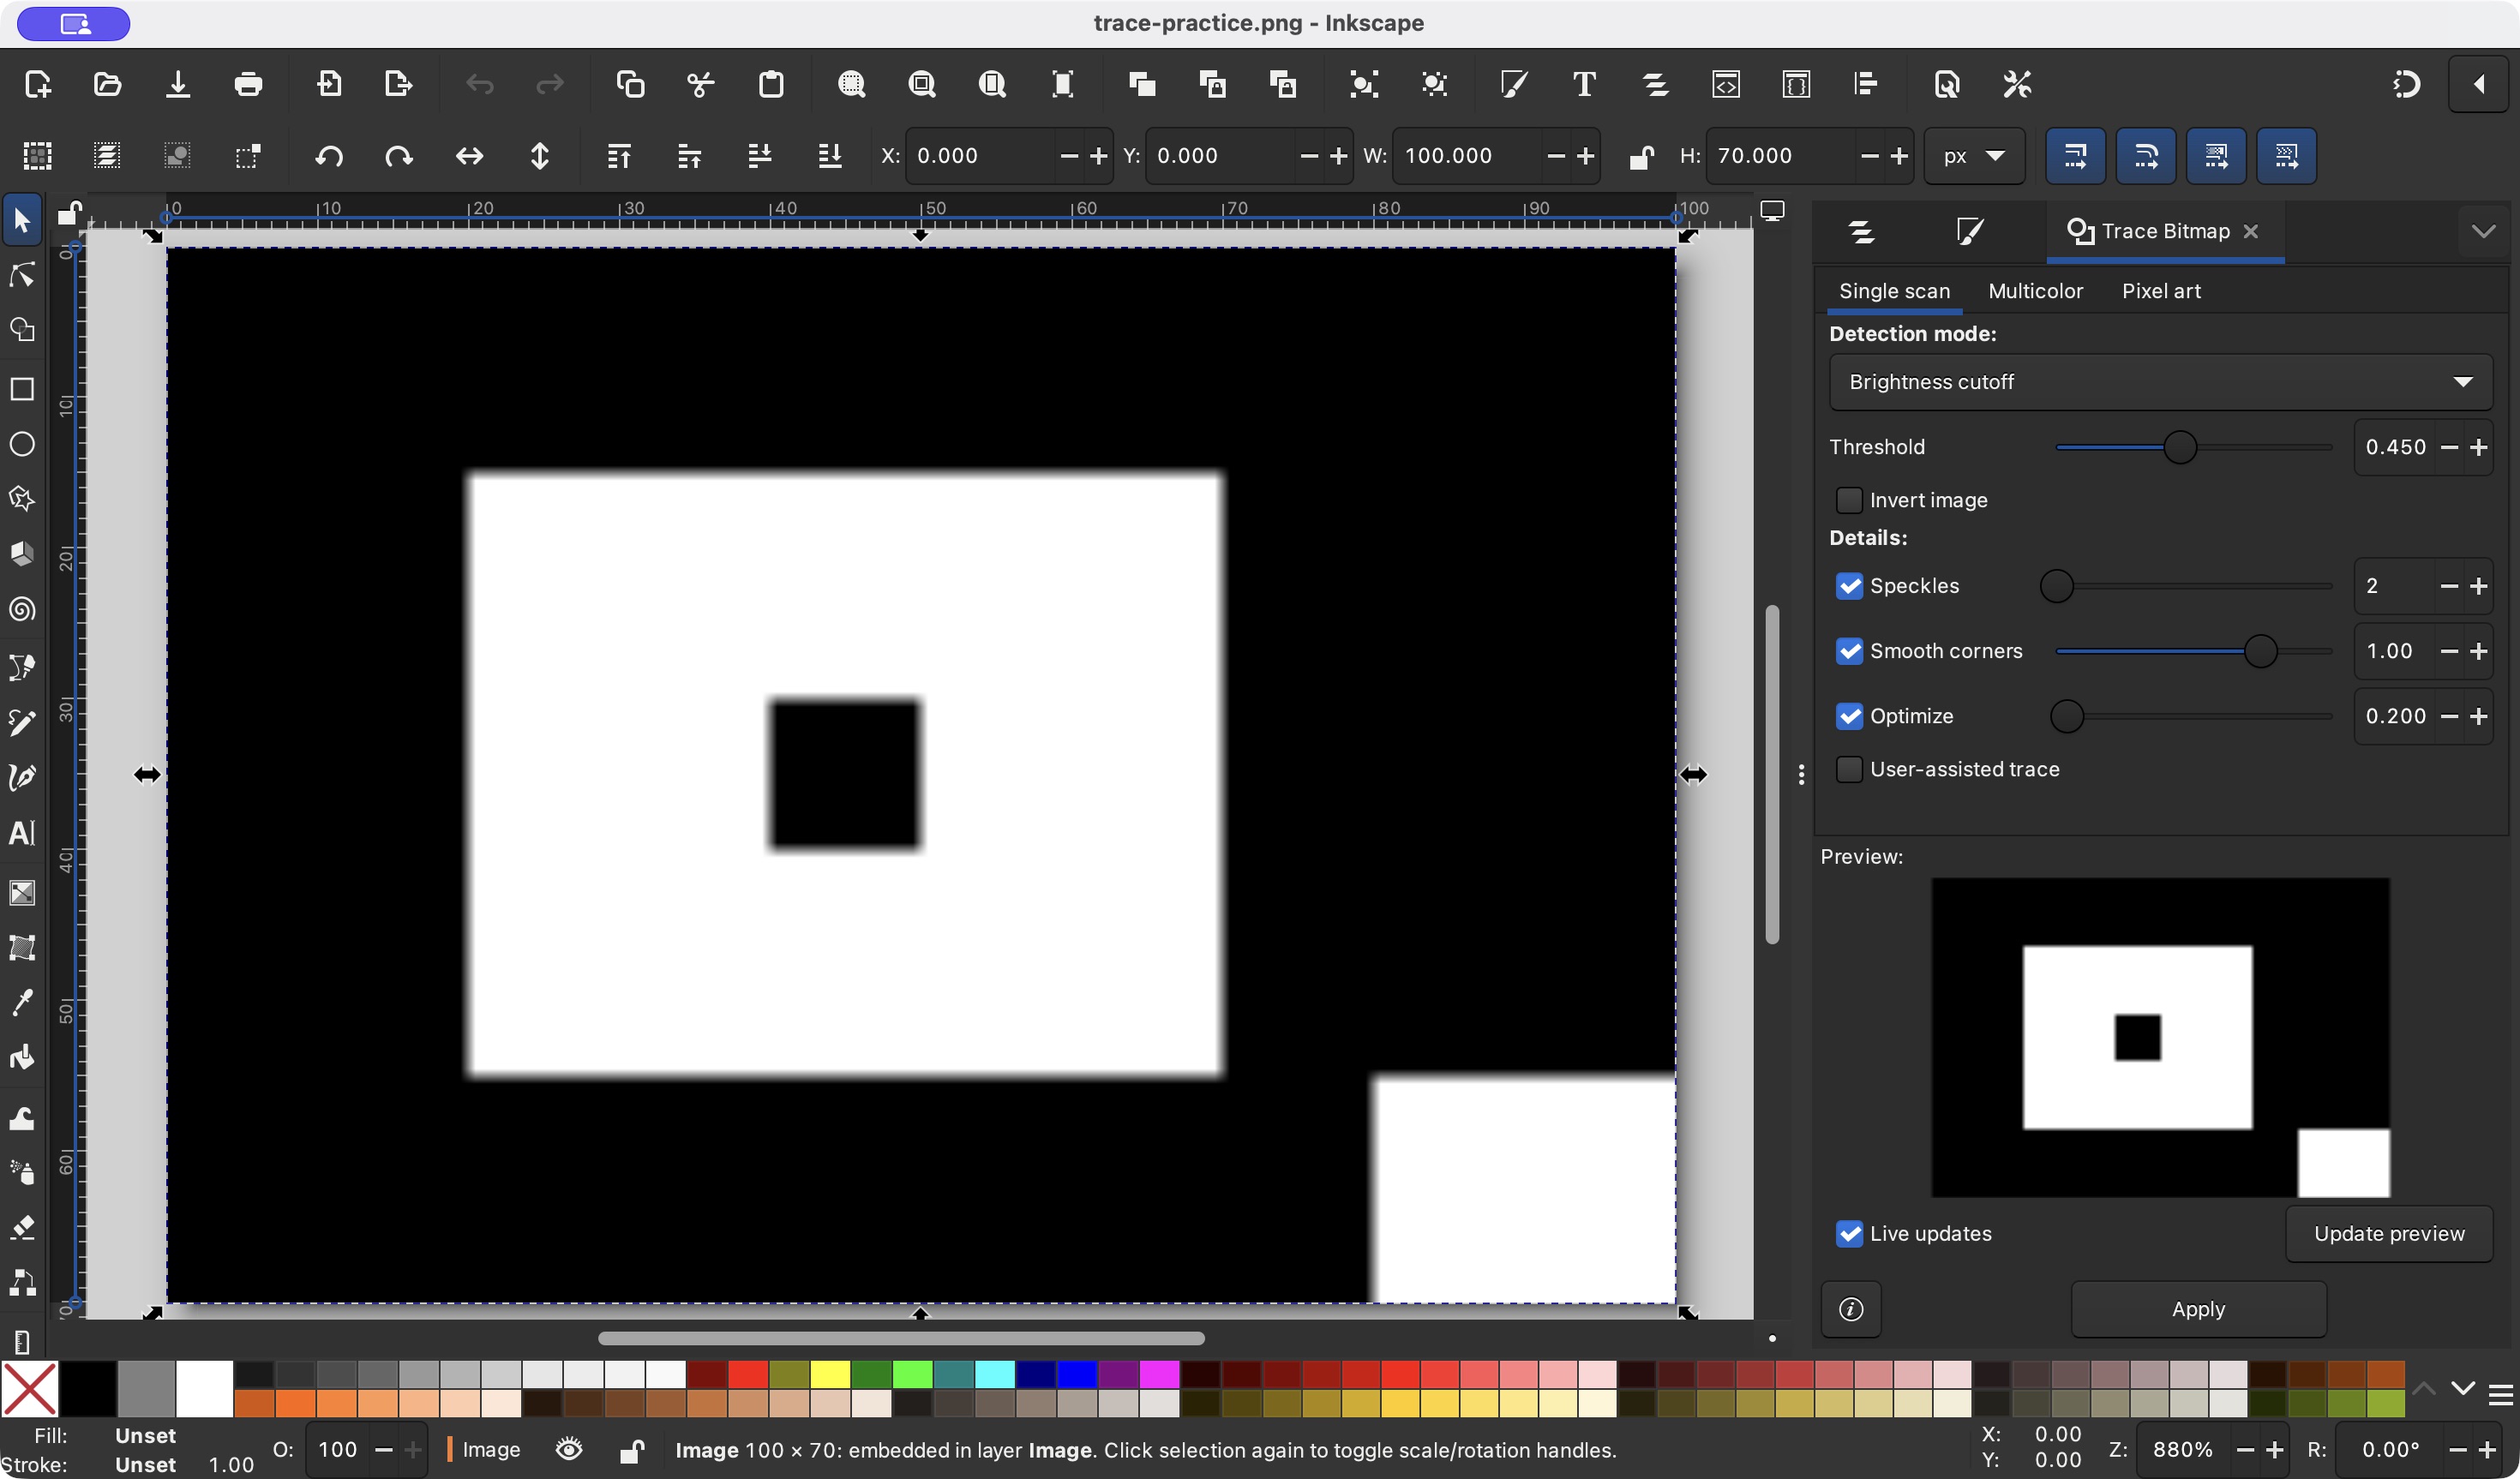
Choose Path → Trace Bitmap. In Single scan, select Brightness cutoff. Start with the preview rather than a universal threshold: the right value depends on the contrast in your file.
Protect holes and small details
Use Live updates or Update preview. Check the smallest hole, thin connection and separate component. Increase the threshold if needed to include lighter marks; reduce it if nearby regions merge. Speckles, smoothing and optimization can also remove or reshape small details.
Apply once and separate the two objects
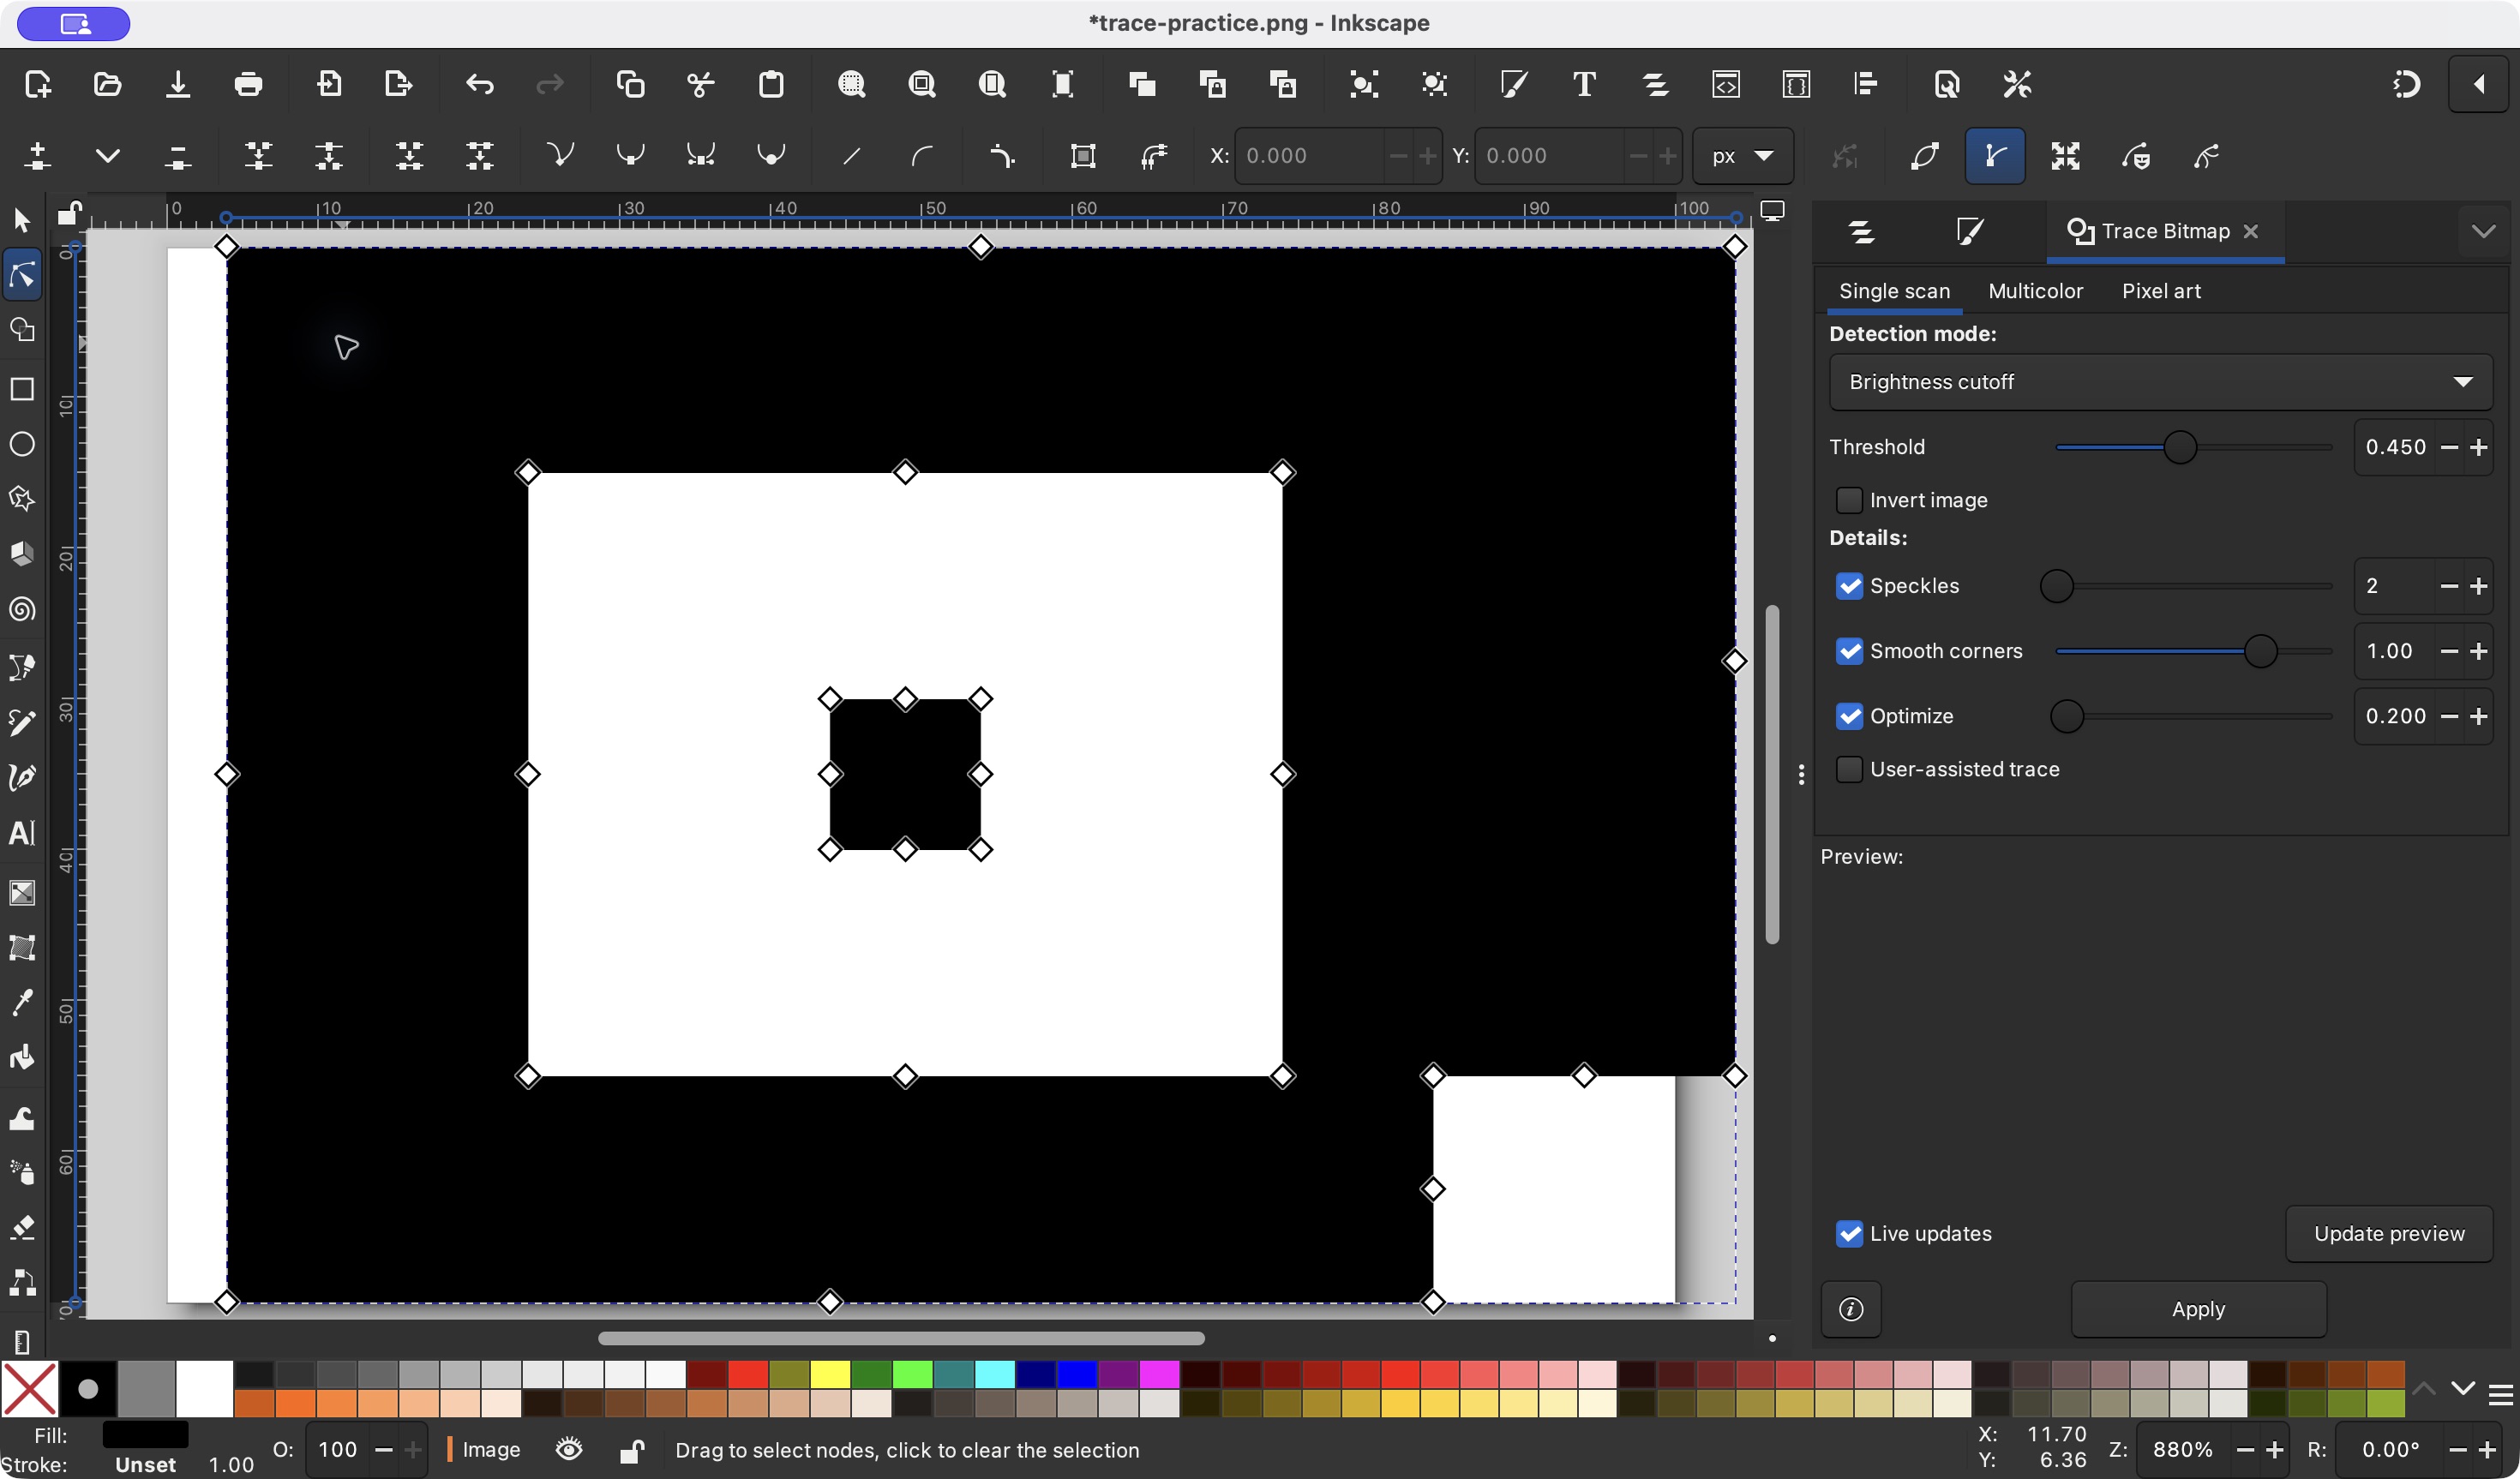
Click Apply once. Inkscape places a new path directly above the bitmap, so the canvas may appear unchanged. Select the path and move it aside. Repeated Apply clicks create additional copies.
Delete the bitmap and inspect the path
Select the original Image and delete it. Select the remaining shape with the Node tool: editable nodes should appear. Keep the hole as part of the compound path; breaking it apart can turn a hole into a filled object.
Save SVG and reopen it
Choose File → Save As and select Inkscape SVG or Plain SVG. Reopen the saved file and confirm the paths are still editable. If the drawing extends beyond the page after moving it, use Edit → Resize Page to Selection before saving. Set a physical drawing size separately if the file is for cutting.
Try the recorded example
Recorded on 9 October 2026 in Inkscape 1.4.4 on macOS. Our self-made 100 × 70 pixel fixture contains a hole, a separate island and a bottom-right notch. Brightness cutoff 0.450 with the shown defaults produced one compound path with three closed subpaths and no image element after bitmap removal.
The traced path was moved for the bitmap-removal check. This SVG retains a 100 × 70 pixel page; it is not a 100 mm cutting file. Compare the nodes and topology, then set your own size and page bounds.


Fix common tracing problems
| What you see | What to check |
|---|---|
| Apply seems to do nothing | The new path may be directly above the image. Move the top object and check its type before tracing again. |
| A solid rectangle replaces the drawing | Check foreground/background contrast, inversion and threshold in the preview. A background included in the scan becomes geometry. |
| SVG still behaves like a photo | The original Image may still be present. Confirm Node-tool editability and remove the bitmap; SVG can contain raster images. |
| Edges have many tiny bumps | Try a cleaner source or cautious optimization. Compare small holes after any simplification; fewer nodes alone is not a quality check. |
Use the browser tool for a simple monochrome file
If you only need a monochrome PNG outline, TraceDXF can trace it locally in your browser. Use Inkscape when you need manual node editing or its desktop tracing options. TraceDXF does not import existing SVG files or provide multicolor or centerline tracing.
Sources and verification
Menu names and the single-scan example were checked in Inkscape 1.4.4. Screenshots and files are project-created engineering evidence; they do not establish results for other images or fabrication equipment.